15 Feb 2016

Get Your Retiring In-Colours Before They're Gone


One of the many awesome features of Stampin' Up! products is our color coordination. In fact it's the reason I became a demonstrator - it makes everything so easy! 
Stampin' Up! has five colour collections.

5 Colour Collections, 10 colors each

  • Brights
  • Regals
  • Subtles
  • Neutrals
  • In Colours
The In Colour collection is a little different from our Core Collection. Each year 5 of these colors are retired, and we get 5 new colors. It’s a great way to stay fresh and trendy.
The In Colour Collections are named by the year they were introduced and the year they will be retired. For example the collection retiring this spring is named 2014-2016 In Colours. They are retired with the Annual Catalog in the spring. This year’s catalog will be retiring May 31, 2016 (marked on the front of the catalog).
You can find the Catalogs online at my Stampin' Up! store. Or click on the icons in the column on the right.
The date of the 2016 Retiring List announcement has not been made yet. It will probably be the end of April or May. Currently, I do not know what else is retiring, nor have the new collection of In colours been announced. I’ll post this info as soon as it’s announced.
I want to give you this head’s up so you can start budgeting your purchases and collecting the products you want with these colours before they sell out. They often sell out within days of the Retirement list being announced.
I recommend stocking up on these products now, especially ink pad refills and card stock. This way, you’ll have everything you need when the list is announced and won’t have to worry about quick sell-outs.

Please contact me if you have any questions or would like to place an order.

Happy Stamping!

14 Feb 2016

Downton Abbey Box

Confession - I have watched Downton Abbey since DAY ONE. I would also tape it and watch it again with a friend who didn't get that channel. Sometimes I'd watch it again if another friend dropped by who had missed an episode. This week I've watched several of the early episodes to take a closer look at clothing and mannerisms, because

I'M GOING TO A DOWNTON ABBEY COSTUME AND DINNER PARTY TONIGHT!!!


I know, it's Valentine's Day and I should be going out to a romantic restaurant with my husband... but it's ok, he's going to be the BUTLER!

I've got my costume put together (we agreed not to spend a lot of money on 'real' costumes), and although it's not perfect I'm pretty happy with it.

And then I started thinking about a hostess gift... the hostess loves Ferrero Rocher, and even though it wasn't created until the 1940's in Italy I thought I could overlook that and make her happy.

But then I looked at the box. Plastic. I doubted the Crawleys would present chocolates in such a manner. 


But I could fix that!  I took the dimensions of the original box and created one of my own. I think it looks a lot nicer!


I used the Birthday Bouquet Designer Series Paper and Mossy Meadow to decorate it, and topped it with a beautiful 1" Stitched Satin Ribbon in Watermelon Wonder.


I think the hostess will be pleased, and I can pretend it's period appropriate.


My favourite Downton Abbey character is Lady Edith (strong, but not so snobbish as Mary). Who is yours? Please leave a comment and tell me.

Happy Downton Abbeying!

13 Feb 2016

A Summery Birthday Card

I saw a card on Pinterest the other day and I fell in love with it. I finally had a chance to CASE (copy and share everything) last night. My card was inspired by Georgeann Manning, and I haven't changed much, but had to use different butterflies as I didn't have the same stamp set.

The cardstock colours are Blushing Bride, Soft Sky, and Whisper White. The sentiment is from Sassy Salutations.


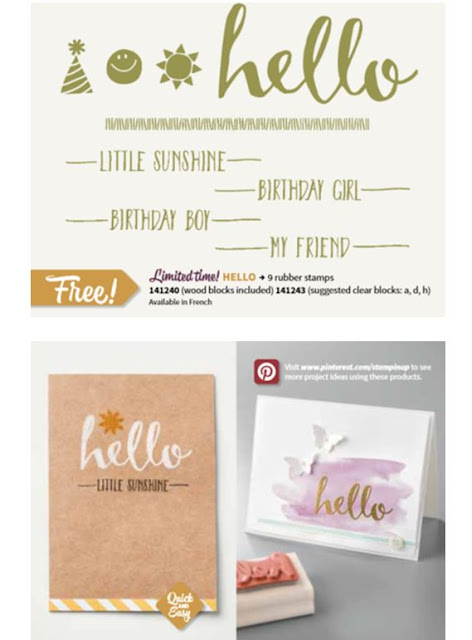
The flowers and leaves are from the Sale-a-bration set What I Love. The large flower was fussy cut and attached with a dimensional. Before I attached the flower I sponged the area with Soft Sky and a Sponge Dauber.


The butterflies are from the stamp set Papillon Potpourri, and sponged with Blushing Bride and a Sponge Dauber, then punched out with the Bitty Butterfly punch. The butterflies were attached with Glue Dots.

The wavy/bumpy lines were hand drawn with a Basic Black marker. Glitz is provided with three Rhinestones.


Inside I used a sentiment from Cottage Greetings, but any birthday sentiment could be used.

You can't tell from the photo below, but I have to confess I attached it to the front of the inside cover, and to add insult to injury - it was upsidedown...sigh. Lol! That was not a part of Georgeann's inspiration!


Supplies for the card are listed below.

I hope you find some time to craft this weekend!

Built for Free Using: My Stampin Blog

11 Feb 2016

Wednesday Wrap Up

Just a few things I want to make sure you know about.

First of all the weekly deals. For more details click on the 'weekly deals' link on the right column.
And there's more Sale-a-bration news:
Don't forget - these 3 products are only available through Monday, February 15th:
 *********************************************************************************

 *********************************************************************************
********************************************************
We have 3 amazing new products coming out on February 16th for our HUGE Sale-a-Bration promotion. For every $60 in product you order, you can choose any of our exclusive Sale-A-Bration items for FREE!!!


Here's a sneak peek at the new items that will be available on February 16th: 


And there's the Clearance Rack!

There's always something new to get excited about! Contact me to place your order!

Happy Stamping!

10 Feb 2016

Have you checked out Botanical Blooms yet?

Occasions Catalogue Preview
Botanical Gardens
Botanical Gardens colors

Botanical Gardens
Coordinating products take the guesswork out of creating. The Botanical Blooms Bundle conveniently combines 3 products so you get the stamp set, Designer Series Paper & Framelits Dies.


COLLECTION
Botanical Blooms stamp set
17 photopolymer stamps

Botanical Blooms logo

Botanical Builder Thinlet Dies
13 pieces

Botanical Builder logo

--- MORE ---

Botanical Gardens Stampin' Up! Collection Botanical Gardens Stampin' Up! Collection Botanical Gardens Stampin' Up! CollectionBotanical Gardens Stampin' Up! Collection Botanical Gardens Stampin' Up! Collection Botanical Gardens Stampin' Up! Collection

Shop Now


Tips and Tricks


The Botanical Gardens Designer Series Paper was designed to be stamped on with our coordinating Botanical Blooms Stamp Set. You can use your imagination and create custom made papers that are unique, like you.

Botanical Gardens Stampin' Up! Collection


SALE-A-BRATION TIME

Shop and Save


Shop now, check items off your wish list, and stock up on basics like cardstock, envelopes, accessories, and adhesives. Since you've been so good with checking things off your wish list, you earn a free Sale-A-Bration product for every $60 you spend now until March 31st.

8 Feb 2016

Easy, Changeable, Wall Decor, and a Blizzard

It hasn't started yet, but within a few hours we're supposed to get a blizzard... over 16 hours of high winds and snow, total amount of the white stuff is predicted to be around 35-40 cm (or in my first language - about 16 inches).


So I'm going to take that lemon of weather and make it into a lemonade of crafting, since I won't be able to go out, even to shovel, or a while.

In the meantime, here is a wall decor item that's easy to make and actually looks quite lovely on the wall (and you don't have to take that from me - other people have commented on it too!)

I actually purchased this before Christmas and used Christmas designs in it, but forgot to take a picture (sigh...)

It's a photo frame from a department store, and cost less than $20.

I filled the background with designs from the Love Blossoms Designer Series Paper Stack. I almost left it like that because it was so pretty.


But I wanted to use the corresponding Love Blossoms Embellishment Kit to make it even prettier. I didn't use all of the kit, in fact I probably used less than half - it goes a long way!


I didn't want to totally cover the DSP so I made sure there was plenty left to see.


The one below is my favourite, and as you can see - it couldn't be more simple. Who can resist Blushing Bride Glimmer paper! Definitely not me!


Finally here is the finished product all together.


 What do you think? I'd love for you to leave a comment below.

Happy Stamping!