31 May 2013

Today is THE day!!!


The new 2013 - 2014 Stampin' Up! Catalog goes live at 3pm Atlantic time today!  

I know you can't wait to place your order, but the online ordering system will be down for catalog transition until  3 pm Atlantic Time, 2 pm Eastern Time, 1 pm Central Time, and Noon Mountain Time.

Orders can be placed after this time. Due to the anticipated large volume of orders, the system may be slow.  Remember, it will be worth the wait!
And don't forget, Friday, May 31st, is that magical day where you can order from ALL THREE CATALOGS!  That's right! You can order from the NEW 2013 - 2014 Catalog, the OLD 2012 - 2013 Catalog, and the Spring Catalog.  

to see the catalogue
at the appropriate time in your time zone!


Be sure to contact me if you have any questions!


Happy Looking!
Carol


20 May 2013

Punching is Fun!

Last week's special class was punch art, which I love! And we had a lot of laughs!

All of these cards were influenced by other demos - that's part of the wonderful world of Stampin' Up! - the sharing of ideas.

This little elephant is one of my favourites! Unfortunately his ears are made with the retired butterfly punch, fortunately I still have mine!


This little bear is so easy to make, and would have been enhanced with sponging around the edges, however that will have to wait for next time.


Yum - hamburgers and chips (American chips, we Canadians call French Fries chips - don't ask me why!)


We couldn't forget that Father's Day is coming up, so if your Dad is a handyman this card would work for him.


My favourite New Brunswick Demo, Maree, also has a wrench card on her blog this week, check it out here.

Happy Monday, and Happy Stamping!
Carol

18 May 2013

Fab Florets Class - You're Invited!

Happy Weekend Everybody!

I want to show you the cards we will be making at my upcoming Fabulous Florets Class on Wednesday, June 19th, DATE CHANGED TO JUNE 26TH 7-9 pm. Fee: $25

This is another tutorial that I've had to improvise a bit because of colour changes, ribbon changes, and the fact I don't have the DSP. The tutorial is by Chat Wszelaki and here is the original photo:


I really like this card set for the bright summery colours, the different card folds, the folder that holds the cards, and the stamp set used. Lots of reasons to feature it in a class.

Here is the cover of the card holder. Instead of using the Peach Parfait cardstock called for, I substituted Tangerine Tango.

 And the inside:


The first card is a triangle fold:


 The second card has extra space for a longer message:


 Or you could tuck a gift card under the fold on the front of the card...


 This is a gate fold card.


 And the last is a side step fold.


 If you would like to learn how to make these cards, and live close to the Truro, Nova Scotia area,
contact me I would love to have you join us!

Happy Stamping!
Carol


17 May 2013

Perfect Plum Pouch & Cards

Hello Everyone!

Today I've been working on a project from Craft Project Central where you can subscribe and purchase tutorials for each month.

This is the one that caught my eye!


However I do not have the large Swallowtail stamp, or the just for you stamp (at least I couldn't find it...)
so I used the Hello, Doily and Vintage Verses stamp sets instead. If you ever find a project you like, don't give up on it because you don't have exactly everything they used - just improvise and choose something else that will work.

Here is my finished project:


OK, I really like the colour of the original project, but it called for Perfect Plum cardstock, and this is what my Perfect Plum looks like! :0)

I really like the shape of the pouch - it was easy to make, but it wasn't deep enough to hold 4 of the flowers from the 5/8" Flower Trim, so I had to improvise again.


This is the pouch open - it does hold 4 envelopes as well as four cards.


And here is how I embellished my cards - I used the small flower from Everything Eleanor, and the sentiment from Vintage Verses (Sale-a-bration).


Even with so many changes I still like the way it turned out! What do you think?

Happy Stamping!
Carol

12 May 2013

It's a day to honour Mothers!

I am the lucky Mom of three beautiful, smart, loving, daughters. One of whom is a Mom herself (Now she knows what I was talking about all those years!!!)

But when Mother's Day rolls around I think of my own Mom and how much she has meant to our family over the years. As some of you know, my Mom is in the late stages of Alzheimer's Disease and lives in a nursing home. She can no longer communicate (she talks but we can't make sense of it), but she can still smile or let you know she doesn't like something! :0) In other words she has a strong spirit, and it was this spirit that held our family together.

Mom married when she was seventeen and she and my Dad were together for sixty-four years. She raised two sons and a daughter. She looked after the farm when Dad worked away. She loved to pick berries and make jams and pies. She won prizes for her needlework. She worked at country stores and is remembered by many people. She cared for her Mom when she became ill from a stroke. She cared for Dad until his death. She had to suffer the loss of one of her sons.

Although we can't reminisce together any more, she has given me so many wonderful memories - funny, sad, wise, and poignant - that I always have something to talk about when I visit.

Today I'm going to talk about the time she dressed up on Halloween and went to visit the neighbours with me. It was my last year to go out - I was about 13 and as tall as Mom. It was the tradition is our village that the neighbours had to guess who you were before you got any treats, and NO ONE could figure out who we were because no one had TWO children our size. At the time I got a little frustrated waiting for all the goodies, but ever since it has been a favourite memory that Mom and I shared. Mom is a treasure!

Here is the card I made for her this year:


I hope your Mother's Day is filled with wonderful memories too!

Happy Stamping!
Carol

7 May 2013

Spring is Blooming at Stampin' Up!

Have you seen the Bloomin' Bouquet Project Kit that Stampin' Up! is offering this month, while supplies last?

If you like 3D flowers, you'll have fun with this kit!


Item 134542    $15.95
Available starting April 29, while supplies last.

Kit contents:
  • 2 sheets of preprinted and precut flowers on 12" X 12" cardstock; makes 13 flowers using Pool Party, Gumball Green, Calypso Coral, Daffodil Delight, and Rich Razzleberry
  • 13 Vintage Faceted Buttons
  • 13 green floral wire stems
Adhesive not included. (Glue gun recommended.)


Ready to go, and lots of fun! Plus a great little gift for teachers, friends, and family.

Contact me or order directly at my Stampin' Up! online store.

Happy Stamping!
Carol

6 May 2013

Pool Party Thoughts

A dear friend of mine is recovering from knee surgery (Hi Linda!), and here is one of the cards I made for her. A Hostess Club member saw it and wanted to make it in class so we did it there too. (Hi Wanda!).


I cased this card from another demo, and I apologize that I've lost the info. If this is your card, please let me know so I can give you the credit!

The card is easy, but intricate.


The paper piercing gives is a lot of detail, along with the two embossed designs.


When I saw the original card it was the first time I noticed these flowers - I couldn't figure out where they came from (even thought they might be contraband!!) But no, they are from our Blossom Party Originals Die! So I immediately ordered it, and have been it for flowers ever since. And anyone who knows Linda knows there has to be bling!! ;)


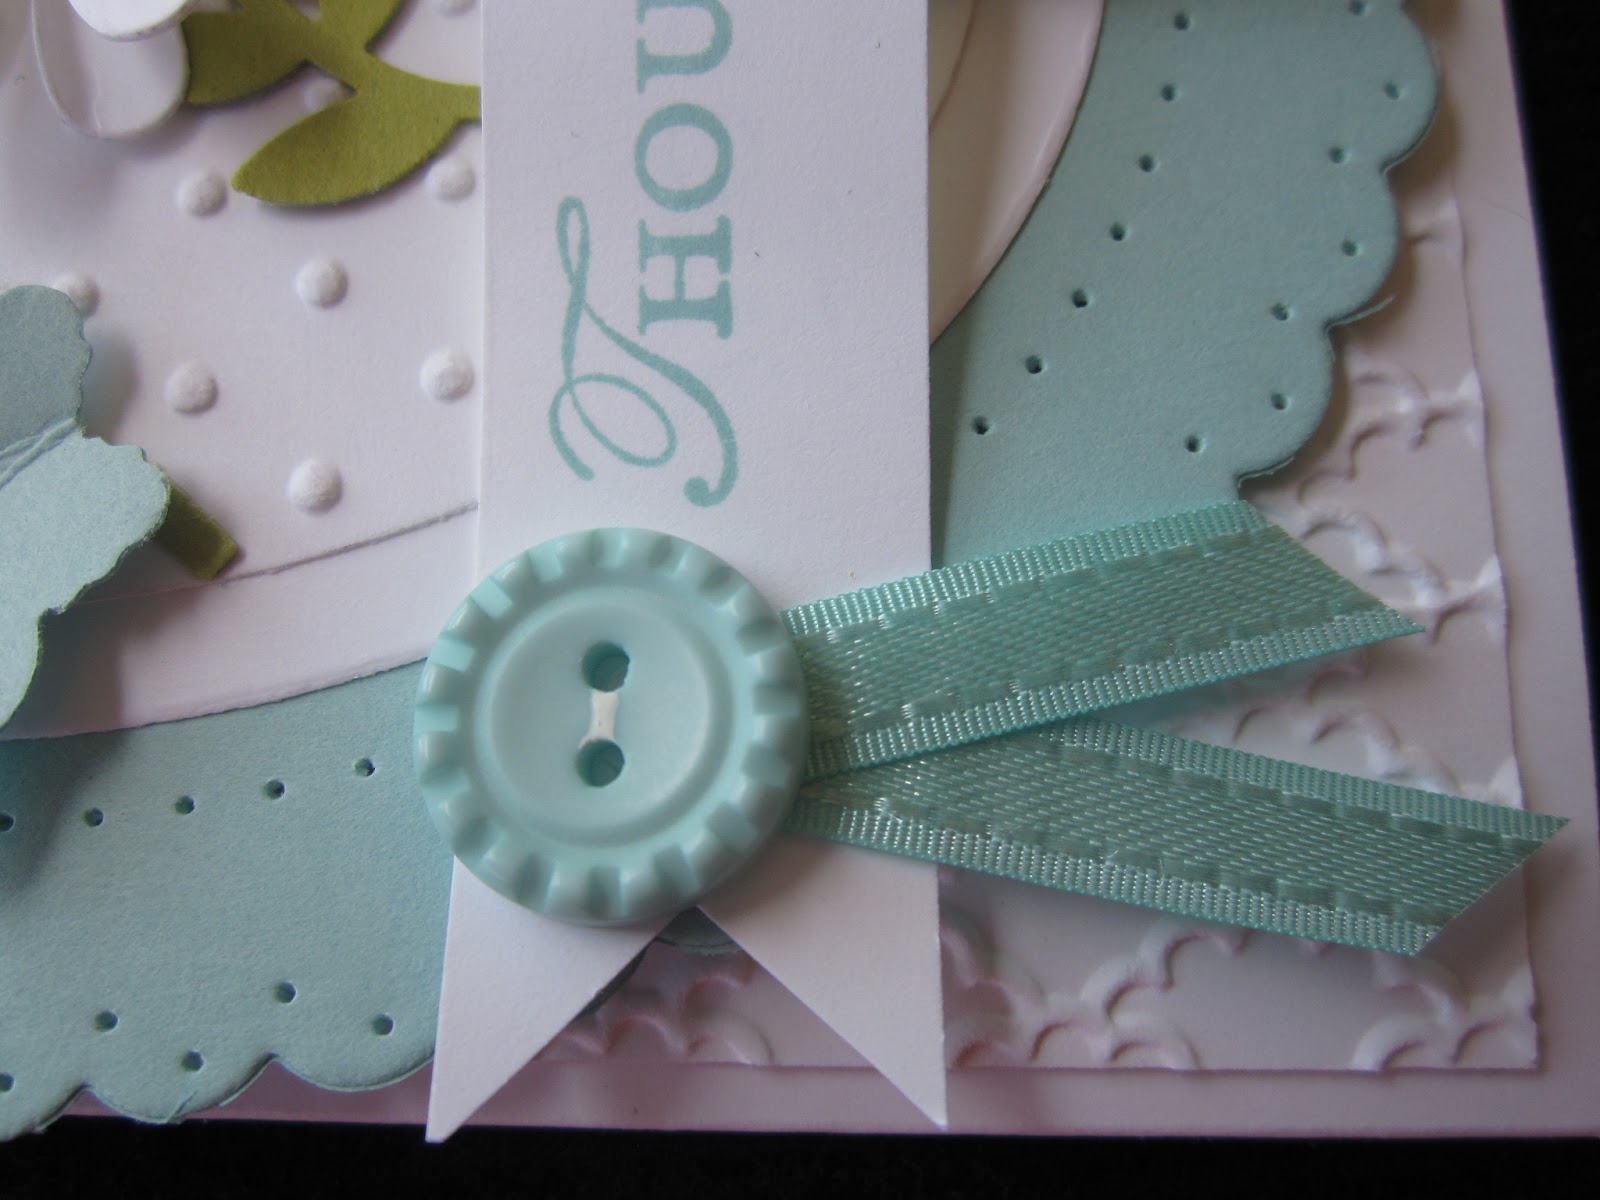
Finally after bling and embossing and paper piercing and die cuts we have a button and ribbon - these are from the Sale-a-bration packs.(Sorry, we can't get them anymore). And because I'm not good at getting twine through little button holes I used my white gel marker. Unless it's magnified - like in this photo - you don't notice it's not real!


 Inside I added two more butterflies with the sentiment.


If you would like to order any of the supplies to make this card you can contact your own demonstrator or if you don't have one and you live in Canada I can order it for you (click here), or you can use my online Stampin' Up! store (click here).

SUPPLIES FOR THIS CARD:
Cardstock: Whisper White, Pool Party, Silver Glimmer Paper
Ink: Pool Party
Stamps: Loving Thoughts, Thoughts and Prayers
Dies & Framelits, Punches: Blossom Party Originals die, Ovals Collection Framelits, Beautiful Wings Embosslits, Little Leaves Sizzlet, Bitty Butterfly Punch, Itty Bitty Shapes Punch Pack.
Accessories: Perfect Polka Dots Embossing Folder, Fancy Fan Embossing Folder, Occasions Paper-Piercing Pack, Paper-Piercing Tool, Stampin' Pierce Mat, Pool Party Button and Ribbon (retired Sale-a-bration), White Gel Pen, Glue Dots, Dimensionals, Snail.

Happy Stamping!
Carol

5 May 2013

Punched Puppy Tutorial

Hello Everybody!
I love punched art and today I have a puppy that will win your heart - at least he does mine!


Don't you just want to pet him?! And you can change his sign to read anything - Happy Birthday, Love You, You're Invited, etc.

I find it amazing how hearts and ovals and circles can come together to create so many images! Here is a photo and list of punches that were used to create this little guy:

Body: Extra Large Oval - cut one
Head: 1 3/4" Circle - cut one
Legs & Ears: Large Oval - cut four
Muzzle: Full Heart, Small Heart - cut one of each
Paws: 3/4" circle - cut two, cut each in half
Eyes: 1/2" circle for whites - cut two, Circle in Itty Bitty Shapes for pupil - cut two
Tongue: Word Window - cut one, then cut in two and use one
Tail: Extra Large Oval - cut one, discard, go back and cut sliver from cardstock just above where you punched the first oval, making it wider at one end.
Tummy: Large oval - cut one in different colour than body.

Once you have your background completed - I used the Cloudy Day Embossing Folder from Sale-a-bration for the sky, and tore the edge of the green cardstock to simulate grass - attach the body with a strip of glue/snail/tape down the center of the cardstock about 3/4" from the bottom of the card. Attach the head in the same way, just meeting the top of the body. With glue just in the center of the head and body you can slide the ears and legs in behind the larger punched pieces and attach. Add the paws and muzzle with dimensionals. I used the White Gel Pen to put the sparkle in his eyes, and a Basic Black Marker for the freckles on his muzzle and claws on his paws. You can use the same colour marker as cardstock to put the indent on his tongue.

I hope you make this puppy for someone - he's sure to bring a smile!

Happy Stamping!
Carol

4 May 2013

Punched Flowers Class continued

OK, even I have to admit that was a long day since my last post! My Mom always used to say "It takes me twice as long to get half as much done", well it took me 30 years, but "I hear ya Mom!"

My dear Mom is now in a nursing home with advanced Alzheimer's Disease, so I miss all the wonderful, funny, loving things my Mom used to say...

And my Mom loved flowers, she tended her garden every year and always picked bouquets to bring inside. She would have loved this flower class!

Today I'm going to show you the magnolia/water lily, the pansies, and the mini sunflowers.

The sunflowers are made with Daffodil Delight cardstock and the 1 3/4" Scallop Circle punch, but if you wanted bigger ones you could use the 2 3/8" Scallop Circle punch. I punched two scalloped circles for each flower. I cut about 1/2" into the flower between each petal, and then I went back and cut each petal in two. I sponged each scallop circle with Tangerine Tango, put them together with a dimensional and then 'ruffled' the petals with my bone folder and fingers.

The center of the flower is made with Chocolate Chip cardstock and the 7/8" Circle Punch and then run through the Big Shot in the Square Lattice Embossing Folder. I think it looks like the sunflower seeds in the center of the flower - yes, I have a great imagination!! If you plan to make several flowers at once emboss a sheet of the paper and then punch out the centers.

My second favourite flower that we created (the rose was my favourite - see the previous post below) is the Pansy. We made it using the retired Butterfly Punch, and I was so disappointed when it retired. However in the past week I've seen a new tutorial for pansies using the round circle punches on Elizabeth Dyson's blog. 
But don't leave yet!! 

I think these pansies look so realistic! And you can use any colour combinations that you have in your own garden! The tutorial using the retired Butterfly Punch is here. They are so quick and easy to make!

The final flower I have to show you is the Magnolia/Waterlily (you can decide which one you think it is!)
These are made with the Ornament Punch (which is retiring this year - get it NOW!). I find it easier to put together if you use a glue gun, and the tutorial for this flower can be found here.


And here is our group's collection of Waterlilies! Aren't they lovely!


I'd love to have you join us for a class - sign up for my newsletter on the right and you will receive a list of up-coming classes each month. We have a lot of fun!

Happy Stamping!
Carol